Generate and Upload Submission
Starting with ez1095 2024, users can now directly upload their ACA forms using the built-in E-File button. For users of ez1095 2023 and earlier versions, submissions require uploading an XML file through our website.
Submitting direct E-Files through ez1095 requires prior purchases of the 1095 e-file service. More information on the pricing can be found here.
Steps to E-File (ez1095 2024 and Later)
Step 1.1.1: Verify Your Data
Ensure all data is correct before proceeding. Refiling with the IRS is time-consuming and challenging. Pay close attention to the accuracy of your 1094B/1094C file and all company information.
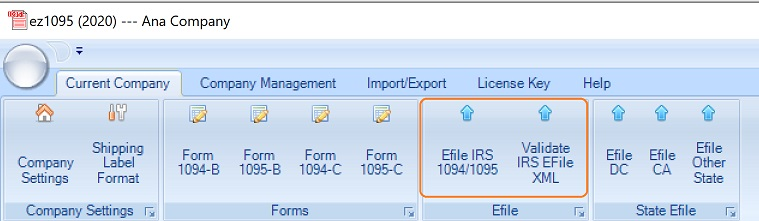
Step 1.1.2: Select the E-File Option
Click the E-File option on the top menu bar.
Step 1.1.3: Fill Out the E-File Form
Select the E-File with Halfpricesoft option.
- For the Transmitter Control Code (TCC) field, enter
MYTCC. This placeholder will be replaced by our own TCC code upon upload.
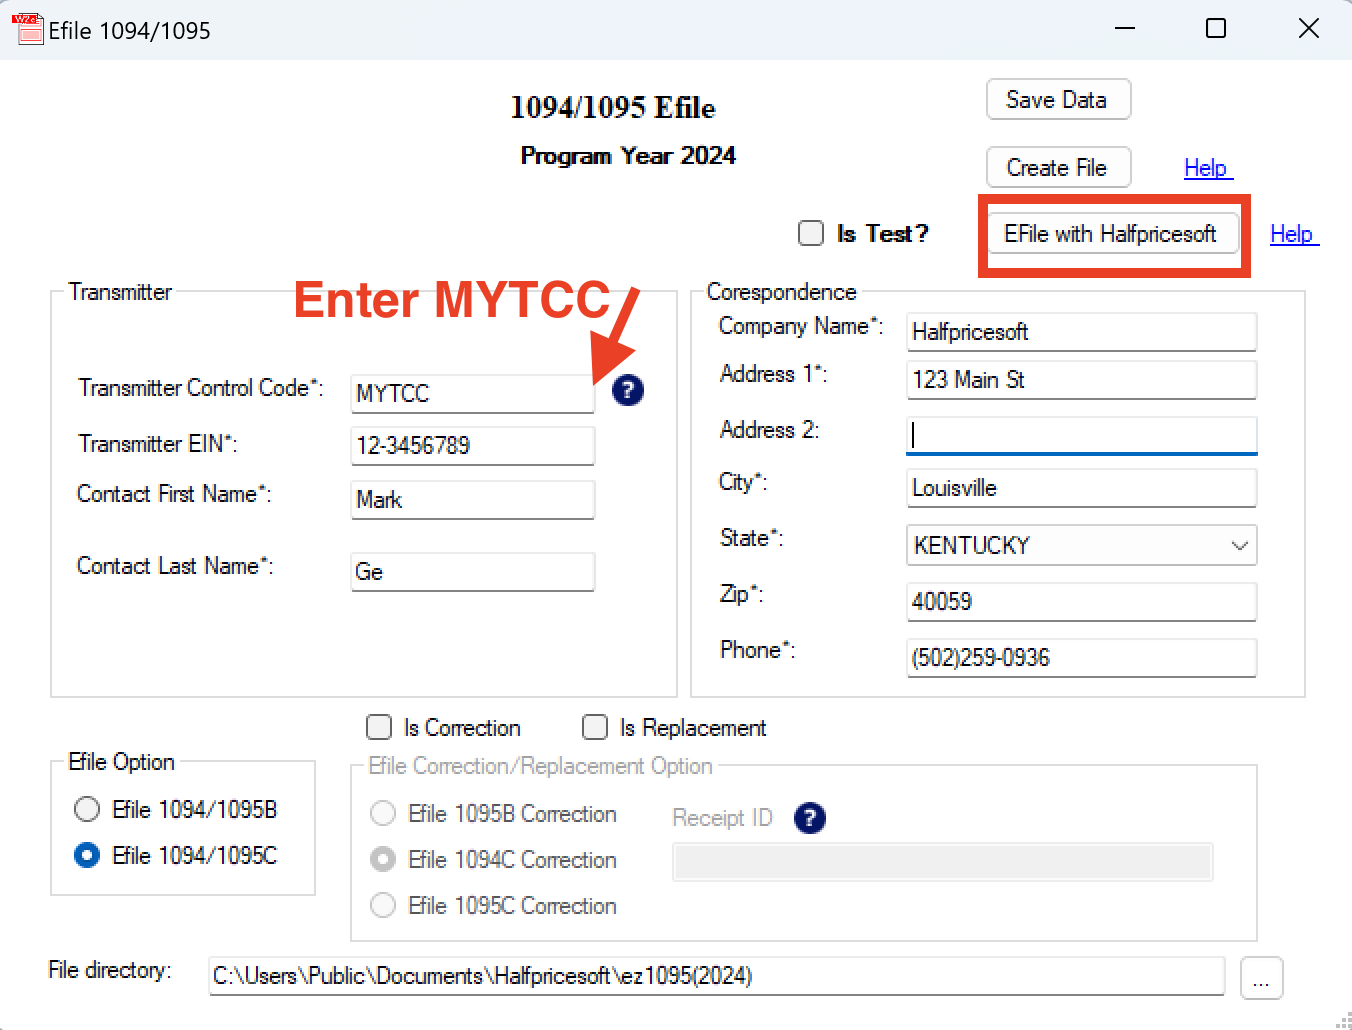
The E-File with Halfpricesoft option is available only in ez1095 2024 and later. If you're using ez1095 2023 or earlier, please refer to the instructions in the next section.
Step 1.1.4: Check for Validation Errors
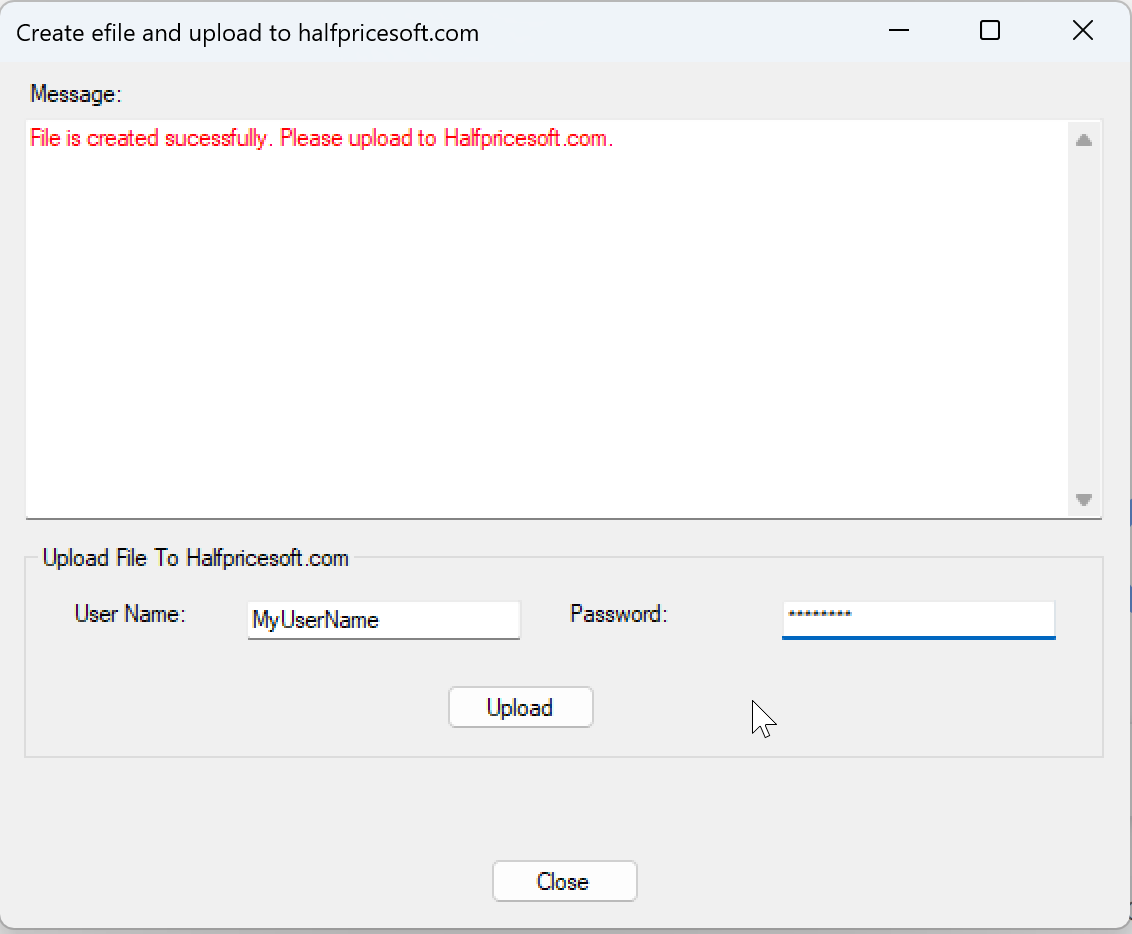
After selecting E-File with Halfpricesoft, review any validation errors.
- Correct any mistakes flagged by the system.
- If no issues are detected, enter your username and password to proceed with the upload.
Step 1.1.5: Monitor Submission Status
After uploading, visit the dashboard monitoring page to track the status of your submission.
Steps to E-File (ez1095 2023 and Earlier)
Click to expand for users of ez1095 2023 and earlier
ez1095 2023 and Earlier
For ez1095 2023 and earlier, follow these steps to generate and upload your submission:
Step 1.2.1: Generate the E-File
After completing the initial steps, the E-File with Halfpricesoft option will not be available. Instead, generate an XML e-file by clicking the Generate E-File button.
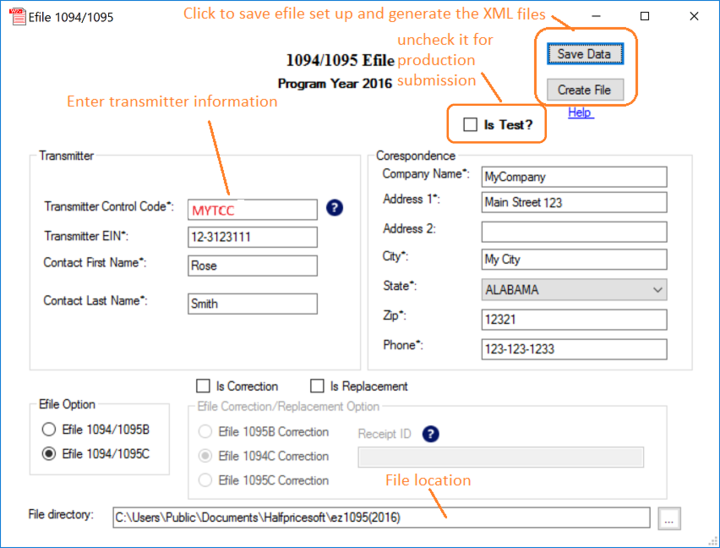
Take note of the file directory where the XML file is saved.
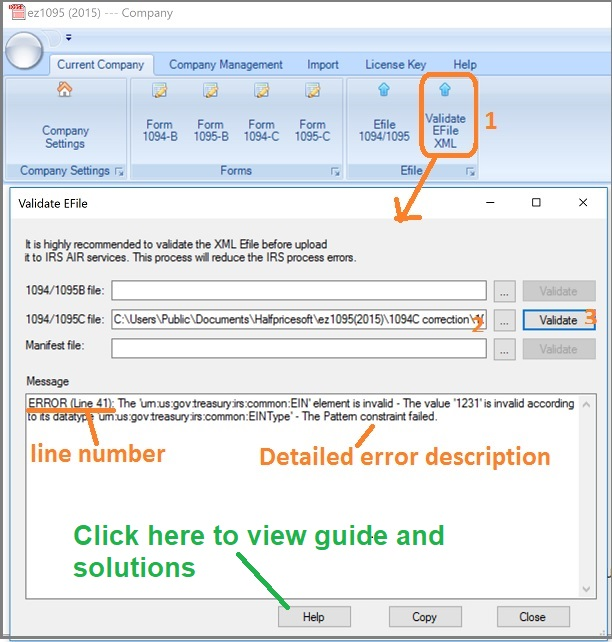
Step 1.2.2: Validate the Data
Use the Validation Tool to check your XML file for errors.
- Fix any issues identified by the system.
- Once validation is successful, proceed to the next step.
Step 1.2.3: Upload the E-File
Submit the validated XML file through the e-file 1095 upload page.
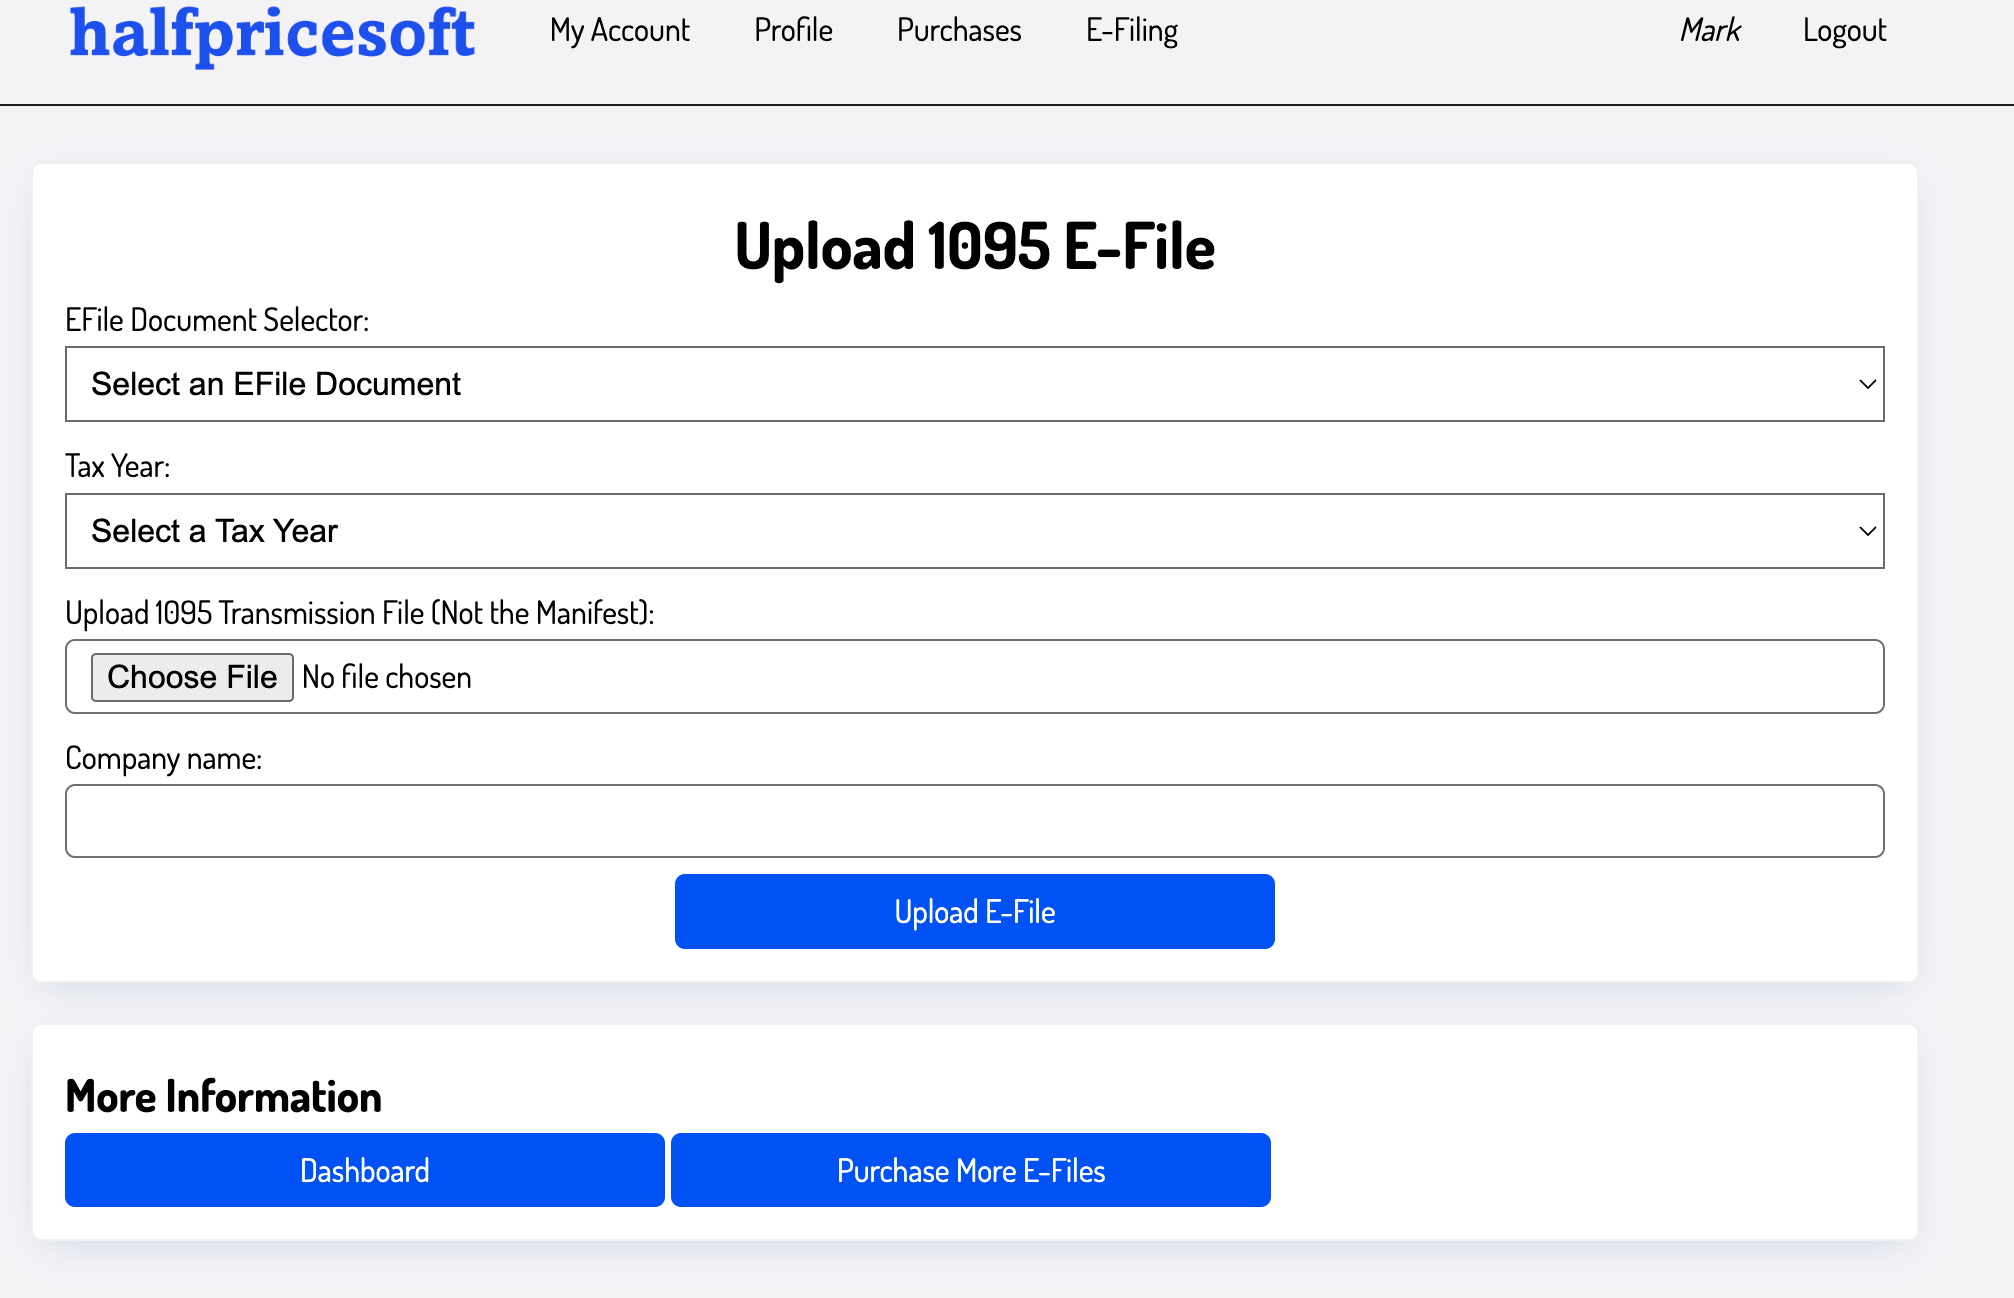
- Select the document type you are uploading.
- Specify the tax year and upload the XML file.
- Enter the company name for which the file is being submitted.
If a validation error occurs or there is an issue with your e1095 credits, an error message will display on your screen. Correct any errors and resubmit until the success screen appears.
Additional Notes
- Ensure all data is accurate to avoid delays or rejection by the IRS.
- Use the dashboard to track submission progress and resolve any issues promptly.
- For further assistance, contact Halfpricesoft customer support.