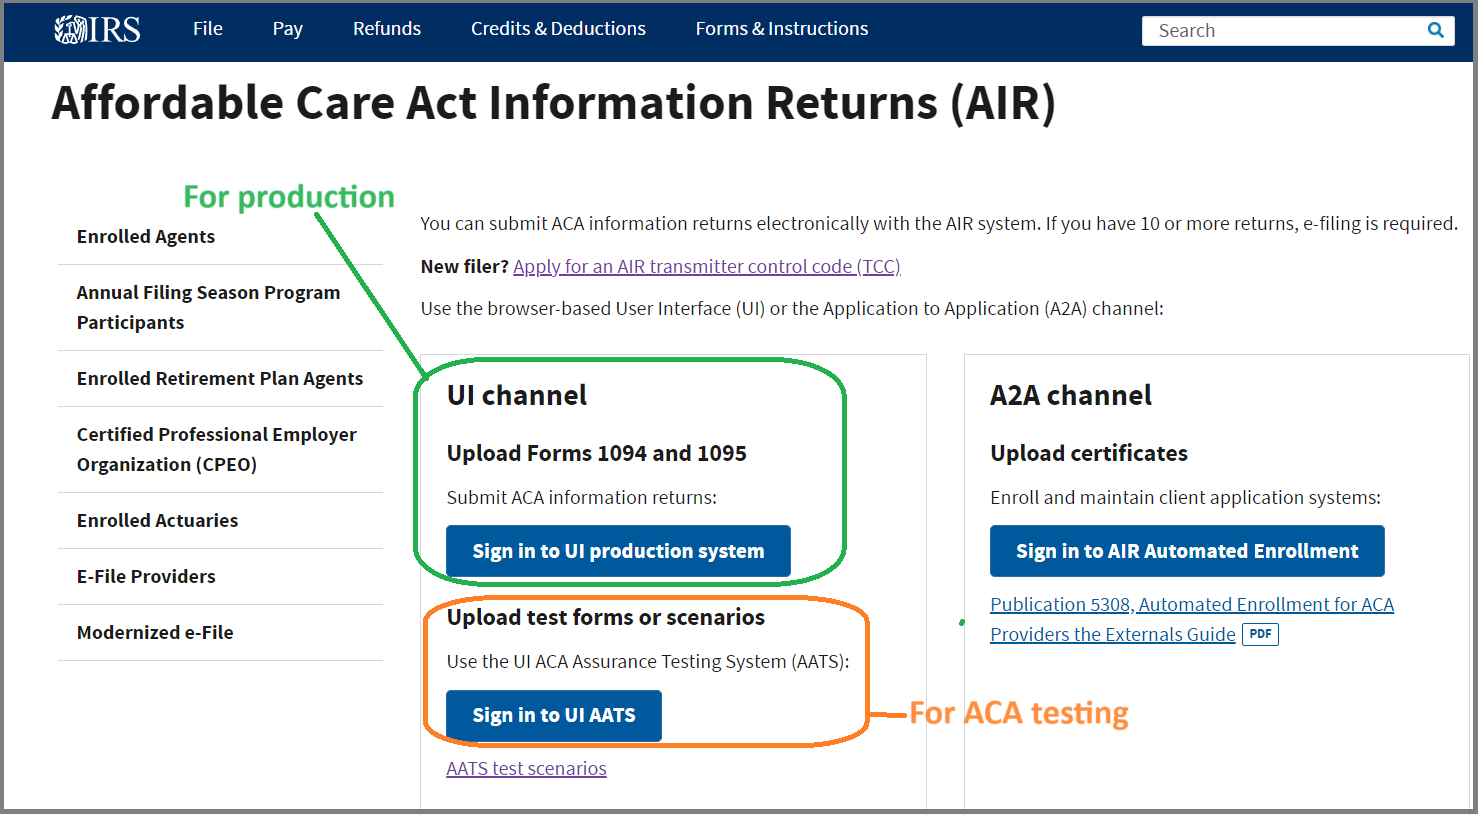
Step 3: Final submission - file your ACA forms to IRS Production site
3.1 Prepare production data
- Add a new account
Start ez1095, Add a new account by click the top menu "Accounts->Add Company" to add new bank account.
- Enter company information
- Enter or import 1095 form information
- Enter form 1094 information
- Print 1095 forms for recipients
Note:
The XML efile documents include both 1095 and 1094 information. The company information will be filled in automatically on form 1094 based on company setup. You need to enter other information on Form 1094 manually(ie: total number of 1095 forms).
Related links:
-
How to prepare and print Form 1095-C and 1094-C
-
How to prepare and print Form 1095-B and 1094-B
-
How to Import Data
-
IRS Form 1094/1095C Instructions
-
IRS Form 1094/1095B Instructions
3.2: Generate XML documents
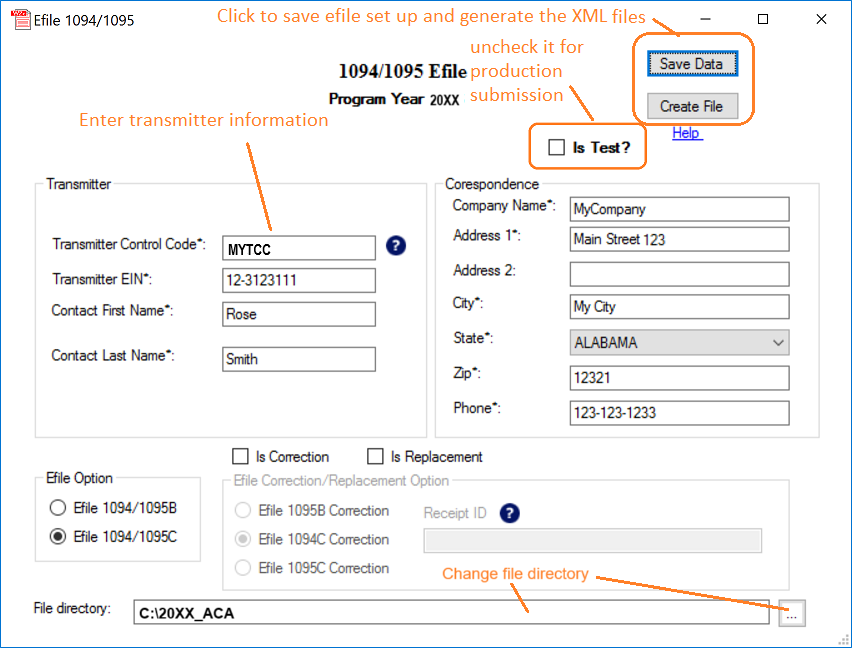
3.2.1 Click ez1095 top menu "Efile 1094/1095" to view efile screen

3.2.2 Input your TCC and correct EIN to generate efile. DO NOT check "Is Test" check box for your production file.
- Click the "Save Data" form to save your efiling settings.
- Click the "Create File" button to generate the XML files: "Manifest_soapheader_xxxxxx.xml" (the manifest file) and "1094X_Request_YourTCC_xxxxx.xml"(the data file).

Your default efile location will be in "C:\Users\Public\Documents\Halfpricesoft\ez1095(20XX)" directory. You can change this path.
ie: for Year 2023, the default path is ez1095(2023).
3.3: Validate XML documents and upload to IRS
There are two file to be uploaded.
"Manifest_soapheader_xxxxxx.xml"
This is the manifest file.
"1094X_Request_YourTCC_xxxxx.xml".
This is the data file.
PLEASE DO NOT MODIFY FILES. Please record the Receipt ID after uploading.


